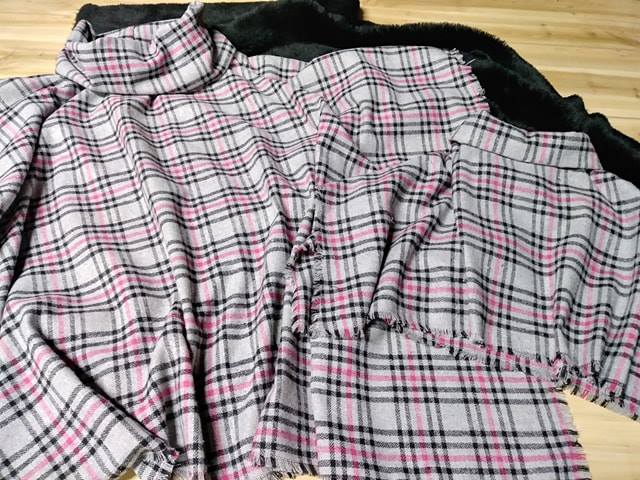
Vector And Raster Images In Fabric Printing
Digital artwork can look perfect on a monitor and still produce disappointing fabric once it reaches the printer. The reason often comes down to how the image stores information. Vector graphics use mathematical paths, while raster images use a grid of coloured pixels. That distinction affects sharpness, file size, editing, scaling and the final appearance of printed textiles.
The difference becomes especially important for Australian applications such as branded café awnings in Melbourne, event backdrops in Sydney, sportswear in Brisbane and upholstery exposed to strong summer sunlight. A file that works beautifully for a website may need careful preparation before it is enlarged across a roll of polyester, cotton or canvas.
Choosing the right format at the start saves time and reduces costly reprints. A logo, repeat pattern or simple illustration generally benefits from vector artwork, while a photograph, painted texture or detailed landscape normally requires a high-resolution raster file.
| Feature | Vector Image | Raster Image |
|---|---|---|
| Structure | Paths, lines, curves and shapes | Coloured pixels |
| Scaling | Enlarges with little or no quality loss | Can become pixelated when enlarged |
| Best suited to | Logos, typography, icons and flat artwork | Photos, textures, shading and realistic artwork |
| Common formats | AI, EPS, SVG, PDF | TIFF, PSD, PNG, JPEG |
| Fabric printing concern | Fonts and colour settings must be managed | Resolution must match the finished print size |
How The Two Image Types Work
A vector file describes an image through coordinates, curves, fills and strokes. Instead of recording every individual dot, it tells design software where a line begins, how it bends and which colour should fill a shape. This makes vectors highly flexible for a logo that may appear on a small clothing label and then on a large retail banner.
Raster artwork is made from pixels arranged in rows and columns. Each pixel contains colour information, and together they create a photograph or complex illustration. When a raster image is enlarged beyond its native resolution, software must invent additional pixels. The result can be soft edges, visible blocks or a generally blurred appearance.
For fabric printing, the distinction is affected by viewing distance. A large wall hanging viewed from several metres away may tolerate a lower effective resolution than a cushion examined at close range. The printer, fabric weave, ink technology and lighting conditions also influence how much detail remains visible.
Where Vector Artwork Performs Best
Brand marks are usually the clearest example. A vector logo keeps lettering and geometric edges crisp when printed on a pop-up display, work shirt or large fabric sign. It also allows a printer to separate colours more reliably, which matters when artwork must match a brand guide or a particular promotional palette.
Vector files are excellent for repeating motifs, simple illustrations, line drawings and patterns with clean blocks of colour. They are useful for Australian businesses creating coordinated materials for a market stall at the Royal Queensland Show, a retail fit-out in Perth or a conference display in Adelaide. A single master file can be adapted to different dimensions without rebuilding the artwork.
This format has limits. A vector illustration can imitate shading, but a highly realistic image may become unnecessarily complicated if recreated from thousands of shapes. Designers should also convert fonts to outlines or include the correct font files, since missing typefaces can alter the appearance of a finished design.
When Raster Files Are The Better Choice
Photographs need raster imaging because natural scenes contain subtle transitions that are difficult to reproduce as simple vector shapes. Product photography, portraits, watercolour artwork and photographic collages should normally be supplied as high-quality TIFF, PSD or carefully exported JPEG files. PNG may suit some transparent artwork, although it is not always the most efficient choice for large print production.
Resolution should be considered at the intended finished size, rather than only by the pixel dimensions shown in a design application. A photo that is sharp at 300 pixels per inch when printed at postcard size may be unsuitable when stretched across a two-metre backdrop. Conversely, an enormous file can slow production without adding visible quality if the viewing distance is long.
Australian conditions can make image selection and colour planning more significant. Outdoor banners in Darwin or coastal New South Wales may face intense UV exposure, while humid Brisbane conditions can affect certain materials and finishing choices. Ask the printer about fabric type, colour profiles, ink durability and whether the artwork will be viewed indoors or outdoors.
Preparing Files For Fabric Production
A strong prepress file combines suitable image types rather than forcing every element into one format. For example, a photograph can remain raster while a vector logo, text and registration marks sit above it. This approach keeps the photo natural and the brand elements clean.
Before sending artwork to a supplier or design studio, check the finished dimensions, bleed, colour mode and transparency. Fabric can stretch, curl or display slight movement at the edges, so important text should stay inside a safe area. Seams, hems, pole pockets and silicone edges may hide part of the image if they are not included in the artwork plan.
Useful checks before export include:
- Set the document to the actual finished size or a clearly stated scale.
- Confirm that raster images have sufficient effective resolution at that size.
- Convert critical fonts to outlines after saving an editable master file.
- Include bleed and keep logos away from seams, hems and corner hardware.
- Name the final file clearly and record the intended dimensions and material.
Colour deserves special attention because fabric rarely reproduces colour exactly as it appears on a backlit screen. The weave may soften fine detail, while the base cloth can influence brightness and saturation. A printed proof or small fabric sample is valuable for upholstery, fashion collections and high-volume retail work. When comparing local suppliers, a studio such as Aurora Design Fabrics can be included in the project brief alongside the required file format and finished dimensions.
Managing A Complete Printing Workflow
A reliable workflow starts with the purpose of the textile. A lightweight polyester flag, a stretch display wall, a cotton tea towel and a heavy upholstery panel all impose different technical requirements. Specify the use, size, viewing distance, wash expectations and exposure to sunlight before the artwork is finalised.
Discuss the file with the printer before exporting. Some businesses prefer a press-ready PDF with embedded profiles; others request native AI, EPS or TIFF files. Ask whether the printer will mirror the artwork, add bleed, manage colour conversion or apply a finishing template. These details are particularly important for custom garments, where artwork may need to be reversed for transfer printing.
A practical handover checklist includes:
- State whether the design is single-sided, double-sided, mirrored or repeated.
- Identify the fabric, finishing method and expected installation position.
- Provide a low-resolution preview alongside the high-resolution production file.
- Clarify colour references, including Pantone values where relevant.
- Request a proof before approving a large production run.
Good communication also prevents a common mistake: assuming that a file extension guarantees quality. A JPEG can be excellent or poor depending on its compression and original dimensions. An EPS can contain crisp vector objects, but it can also include embedded low-resolution images. The file must be inspected, not judged by its name alone.
The safest approach is to retain an editable master, export a production copy and document every conversion. For a logo-led project, keep the original vector file available even if the printer asks for a PDF. For a photographic project, preserve the layered PSD or original camera file so colour or cropping can be adjusted after a proof.
When selecting artwork for Australian fabric printing, match the file type to the visual content and the physical job. Use vectors for scalable shapes, lettering and logos; use high-resolution raster files for photographs and complex tonal artwork; and combine both when the design needs clean branding over a realistic image.
Prepare the artwork with the actual material, dimensions, viewing distance and installation conditions in mind. Then send the printer a clear brief, approve a proof where practical and keep the source files safely archived. Taking these steps before production gives fabric graphics a sharper, more consistent and more professional result.