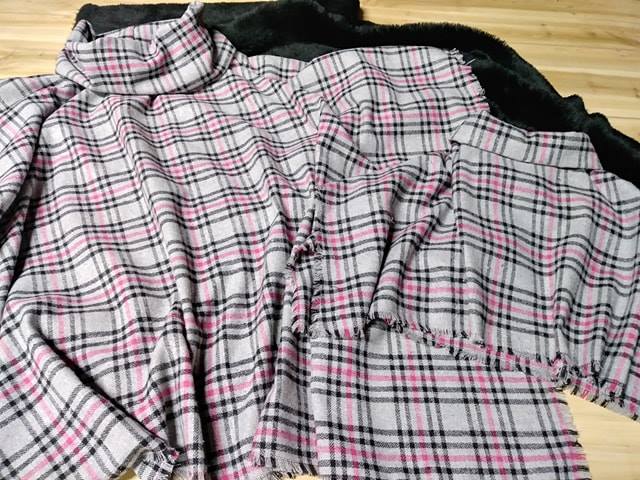
Designing fabric patterns that scale well for large format printing
Large format printing magnifies every decision in a repeat. A curve that looks balanced on screen can expose uneven joins across a 2.4-metre panel, while dense florals become noise from six metres away. Successful textile artwork begins with physical scale, not the software canvas. Treat the motif, repeat, substrate and viewing distance as one design system.
Printers working with polyester, cotton, linen and blends may use dye sublimation, reactive dyes, pigment inks or heat-transfer vinyl. Each responds differently to fine lines, saturated colour and repeated shapes. Artwork can look crisp digitally yet appear softer after pre-treatment, steaming or washing. Technical decisions made before drawing help prevent test panels and colour claims that cannot be reproduced.
For Australian briefs, local conditions belong in the artwork plan. Melbourne studios often combine fashion, homeware and hospitality commissions, while Sydney projects include event graphics and retail installations. Brisbane's heat and humidity can affect curing before final use. Strong ultraviolet exposure, domestic washing and line drying are routine realities. If a finished textile enters consumer sale, check the Australian Consumer Law and applicable state or territory fibre-content and labelling rules before approval.
Define the visual scale
Start with a dimensional brief: panel width, finished repeat, number of seams and where the audience will stand. A pattern for a 1.8 m trade-show backdrop has a different job from one covering a curved hospitality wall. Compare a full-size digital proof with a printed fabric square under consistent viewing conditions. Viewing distance changes which details deserve emphasis.
Design the repeat as a visible rhythm rather than an afterthought. A half-drop or brick repeat can disguise joins, while mirrored repeats suit botanicals and geometric motifs but need control of directional elements. Avoid placing a recognisable face, logo or isolated object on a seam unless the client intends that interruption. For apparel and upholstery, test the repeat against body or furniture dimensions.
For oversized fabric graphics, preserve generous negative space. Dense all-over patterns gain contrast from the wall and compete with nearby products or signage. One large branch may read more confidently across a canopy than fifty tiny leaves. Establish minimum motif size by printing, because inks, weave structure and finishing can alter apparent detail.
Build repeats that tile cleanly
A seamless repeat depends on edge logic. Draw or construct the tile so elements crossing one edge continue at the opposite edge, then inspect overlaps in a grid large enough to reveal the rhythm. Vector pattern fills suit geometric work because they can be tested at several scales without new raster files. Keep the master editable and make duplicated versions from that source.
For raster imagery, calculate pixels from the physical output rather than selecting a generic quality preset. A 2-metre-wide image at 150 pixels per inch needs roughly 11,800 pixels across; a 3.2-metre version needs about 18,900. Large photographic or painterly motifs may justify 200–300 ppi. Upscaling a small internet image creates soft edges that can make an installation look uncertain.
Production teams should keep the Aurora Design Fabrics journal in the research folder, but treat its current HostGator setup page as a placeholder until verified textile guidance replaces it. This prevents an unrelated resource from influencing artwork decisions.
Match artwork to the printing process
Before choosing an output route, ask the supplier which printer and substrate will be used, whether the file is mirrored for transfer, and how the fabric is pre-treated. Dye sublimation suits polyester and preserves fine gradients; pigment and reactive processes can work on other fibres but may shift in hue or alter hand feel. Solvent ink, cut vinyl and direct-to-fabric pigment are different workflows. Match the master to the actual method and test a representative crop.
Use two checklists to keep design and production approval separate. The first protects the artwork; the second tests assumptions about cloth, printer, installation and washing. Tick each item with a dated note rather than a verbal assurance.
Artwork preflight
- Confirm panel dimensions, repeat unit, orientation and repeat direction in writing.
- Supply vector geometry where possible, embed raster assets and outline fonts only if required.
- Apply the supplier's ICC profile and spot colours; check pale and saturated areas on the fabric.
- Add requested bleed, crop marks, seam and hem allowances without changing the visible repeat.
- Name files clearly and separate the approved master from working and proof versions.
Production preflight
- Test on the exact base cloth, including stretch, weave, coating and pre-treatment.
- Record the printer, profile, ink or dye, press temperature, dwell time and curing conditions.
- Request safe handling instructions for pretreatment chemicals under applicable work health and safety laws.
- Check colour, registration, joins, repeat consistency and edge detail on a full-width sample.
- Assess wash, rub and lightfastness for the actual Australian exposure and cleaning routine.
- Provide a sewn or mounted proof where hems, tension and distortion affect appearance.
Test for Australian use conditions
Australian conditions should be written as performance requirements, not vague promises of durability. Ask whether the print must survive a hot walk to the train, a backyard wash, salt-laden coastal air or strong ultraviolet exposure. Domestic washing and line drying remain common, while event textiles also face sweat, abrasion and repeated packing. These routines expose weak seams and colour shifts that a studio sample misses.
Fabric stretch, bias and seam shrinkage can move a motif. Have the supplier test dimensional change after washing or pressing, and specify whether tolerances apply before or after the first wash. For outdoor use in Brisbane or along the Gold Coast, include ultraviolet exposure and humidity in the sample review rather than treating coastal air as an edge case.
Colour claims need an agreed measuring method. Compare a printed swatch with a physical reference under daylight, record the tolerance, and ask which instrument the printer uses. Any external colour profile guidance should remain a secondary reference: laboratory readings and the supplier's production profile should govern approval. Keep the light source and viewing angle consistent during review.
Compare scalable production approaches
The most scalable workflow depends on run length, fabric, detail and expected life. Short promotional runs may justify simpler preparation, while long runs need repeatable tile definitions and disciplined colour standards. Compare finished fabric, including seams and fixing, rather than ink swatches or on-screen images.
This comparison focuses on the practical trade-offs behind each route. It assumes an Australian supplier can provide a sample, documentation and clear restrictions on colour, width and washing. If a process cannot meet the brief, a more advanced printer will not rescue artwork that was never prepared for that substrate.
| Production route | Strongest use | Scaling method | Main watch-out |
|---|---|---|---|
| Dye sublimation on polyester | Photographic gradients and all-over prints | High-resolution raster with an ICC-controlled transfer | Suitable polyester and usually a pale base |
| Reactive dye on cotton and linen | Soft hand feel, fashion and home textiles | Vector or high-resolution raster plus pre-treatment | Pre-treatment and batch colour variation |
| Pigment on natural cloth or canvas | Banners, awnings and durable home textiles | Vector or raster with a pigment profile and primer | Surface ink can change the hand feel |
| Heat-transfer vinyl | Logos, lettering and bold geometric motifs | Scaled vectors with cut paths | Not seamless; overlaps create heavier areas |
Package the final handover
A professional handover makes the approved pattern usable without guesswork. Supply a print-ready PDF or required native file, the editable master, images, colour references, dimensions and repeat instructions. Identify the fabric code, print method, profile, direction, quantity, trim and hem allowances, and finishing steps. Add a simple specification sheet.
Include the signed production sample and a short approval record. State what was checked, who approved it, the date and agreed tolerances. This matters when a design moves from a Sydney installation team to an off-site fabricator or from a Melbourne studio to a wholesale buyer. Version names should reveal sequence without relying on words such as final or final-new.
Turn the next design into a controlled test: choose one motif, define its physical scale, produce a full-width sample, and record how it behaves after the intended wash or exposure. Once that sample matches the brief, package the files and contact an Australian textile printer to confirm feasibility and book a production run.